Showing posts with label Christmas in July. Show all posts

Tuesday, July 16, 2019

🎄12 Days of Christmas in July 🎁 with *2* Giveaways!


*giveaways are now closed*

Hello friends, Merry Christmas in July!

Since the last time I was on the blog the temperature has turned a 180 on us, it is blazing outside now!  Which makes it nice to sit and sew and think of cooler days to come.  😁  I was super excited when Sarah at Confessions of a Fabric Addict invited me to participate in the blog hop again because I had some projects to get done.  Thank you Sarah for organizing all this goodness!  In addition to all the inspiration you will see on this hop there is a giveaway sponsored by FIGO Fabrics that you can enter to win on each participating blog, and I am also having a celebratory giveaway!  The giveaway links are near the end of my post.

First, I completed a couple pillowcases for my nieces.  I love the "burrito" method with French seams, it makes such a nice gift.

Secondly I completed this quilt!  A bit of back story on this:  I was picked by Henry Glass for the Desire to Inspire Challenge in May 2019, and got to work with this beautiful collection of fabric called Jolly Ole Soul by Barb Tourtillotte (visit here for pictures of my projects) and origionally planned to use this as the backing of the quilt I made.  I ended up liking it too much to part with, so instead made it even larger and quilted it up for John and I to snuggle under!
I made this quilt with the panel that is part of the line and then made some simple present blocks using flying geese for the bows.  I made my "presents" different sizes and alternated the background for added interest!  I also used a couple prints from last year's Challenge with the Just Beachy fabric.  And I decided to quilt an edge to edge pattern with the swirls as they mimic the swirls in the white around Santa, and it was relatively quick to stitch out.  Sometimes you just need your project to be finished!

I backed it with flannel, fyi
RED FLANNEL BLEEDS
and you should wash it before doing anything else with it.  I washed mine twice with 3 color catchers each time, and I think I will be comfortable sleeping under it now.

I had to get John to take a photo of how much taller the quilt is than I am, I'm so excited to have it cover my toes and nose at the same time!

I really appreciate you taking the time to visit my blog today, and guess what?  This is my 100th post and in celebration I am offering a giveaway in addition to the one from FIGO Fabrics (entry form below my drawing)! I am offering a pair of handmade beaded Christmas earrings!  Your choice of either snowmen or Santa earrings if you win.  My giveaway is open until July 27th and I will announce the winner shortly after.
(I have to limit this to US only due to ridiculous international postage rates, but I will figure out an alternate prize if you are overseas!)

a Rafflecopter giveaway

And here is the beautiful fabric from FIGO Fabrics (a fat quarter bundle!):


Make sure to click SUBMIT!

I hope you have lots of fun exploring the posts on this blog hop and get a ton of inspiration!

Brandy

Thomas and Belle say "hello" too!  They really love this rainbow quilt, I am guessing it's the wool batting.


I am also linking to

Monday, July 15, 2019

12DCIJ Schedule 2019

Yay, it's time for the 12 days of Christmas in July again!  Visit each of these blogs to get some great ideas and be sure to swing by here again on Wednesday for mynpost and a giveaway!

Tuesday, July 24, 2018

12 Days of Christmas in July 2018

Welcome to the final day of 12 days of Christmas in July 2018, hosted by Sarah at Confessions of a Fabric Addict!  Thank you Sarah for hosting this and letting me participate.

I have been having a lot of fun working on my project, and I have a tutorial for you today.  I hope you will also visit Susan at Quilt Fabrication and Jean at All Points of the Compass to see their projects this year.

When I first got my longarm last November I wanted to see how well it worked with different fabrics so I bought a yard of satin and stitched out a pantograph.


The satin stitched out beautifully!  I showed everyone in my family because I was so excited with how it turned out.  Then they asked me how I planned to use it.  I had actually thought that through beforehand (for once!) and was able to confidently reply, "Stockings!"

Aren't they beautiful?!  I am so happy with how they turned out and am really looking forward to making some more in other colors (I just pulled silver satin with a Christmas lights pattern off the machine yesterday and I plan to do red satin with a holly leaf pantograph next).  And the most exciting thing happened while stitching out the snowflakes on the blue fabric, I hit one million stitches on my longarm!  Celebrations are in the works, you will have to check back next week to see what we have planned...

STOCKING TUTORIAL
 
The great thing about stockings is that they come together quite quickly, once the quilting part is done.  And because I quilted the satin with a muslin backing I did not feel like it needed a lining, so one less step in the process.  If you are not comfortable quilting satin yourself or are not set up for pantographs, you could always ask your longarmer to quilt some up for you, or you can contact me!  My website www.bluespoolsewingroom.com has my information if you are interested.
 
For this project you will need:
quilted fabric for the stocking body
minky for the cuffs
white fabric to line the cuffs
cord for a hanging loop
 
Disclaimer: this tutorial is a generic how-to, there are no exact measurements or templates.  This allows you the freedom to make a stocking in whatever size suits your needs. :)


I traced my current stocking onto a large sheet of paper and added a quarter inch all the way around to create a template.

You want to be sure to cut out your pieces so they are facing opposite ways.  Put them right sides together and sew a quarter inch seam using a 2.0 - 2.5 stitch length.  Cut notches into the toe and heel curves to help ease the curve when you turn it right side out.  I used my pinking shears to do this.


I also did a zig zag stitch along the edges after sewing the two halves together so it will not fray quite so much.

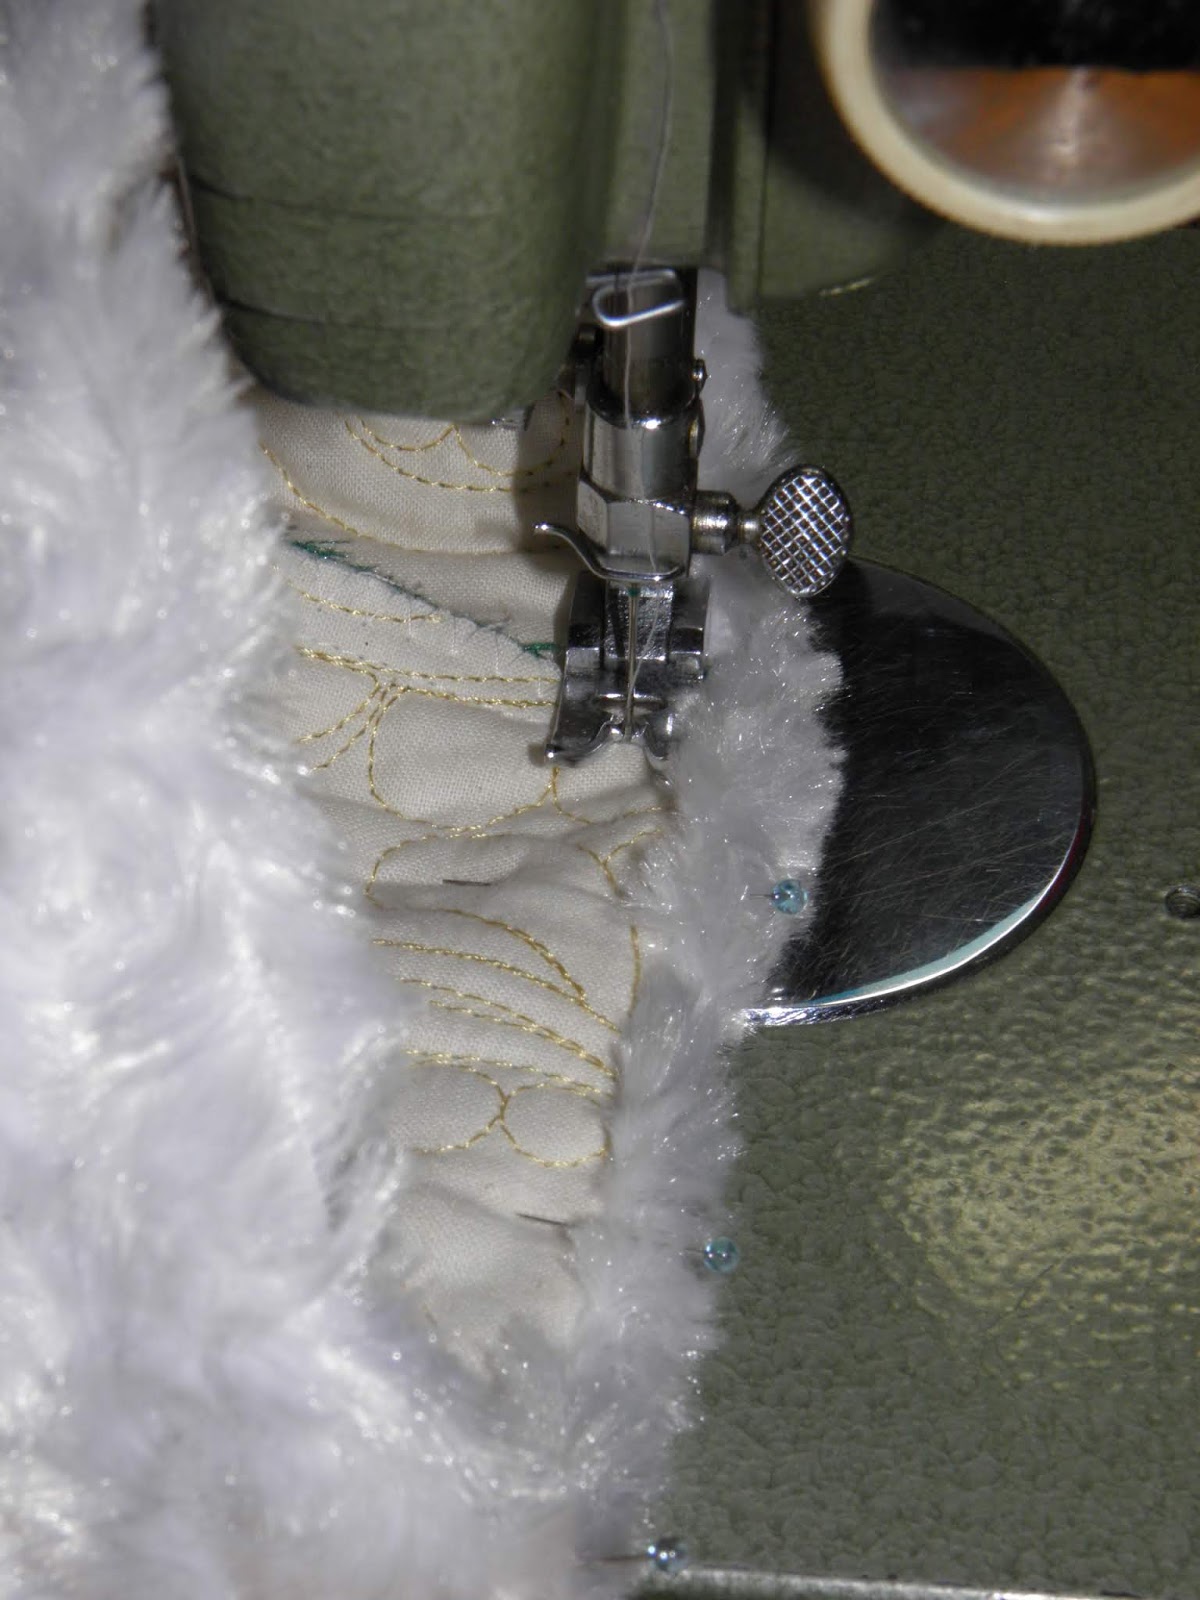
I decided to use some fluffy minky for the cuffs, and I highly recommend putting painters tape on the fluffy side before cutting to keep down the nastiness that usually comes with cutting this apart.  FYI, putting the tape on the back side does not help.  Ask me how I know...
 
When measuring for your stocking cuff, make sure to measure across the top of your stocking after you sew the halves together, multiply the measurement by two, and add half an inch to that amount for seam allowance.  I also found I needed to add a lining to this as the dark color of the stocking showed through a bit.
 
I cut the lining the same size as the cuff, then sewed along one long edge using a quarter inch seam.

Then I top stitched about 3/8 inch up to keep it tidy.


Then I turned the stocking right sides out, basted the hanging hoop an inch from the LH side (loop will be between the cuff and stocking and pointing towards the inside of the stocking) and then inserted the cuff.


This part is always hard for me to remember which way to put it in, but you insert the cuff as if you were putting it on the outside.  It works every time, trust me!  I sewed the cuff with a quarter inch seam, then turned it right side out and top stitched it about half an inch from the top.
I found that setting my stitch length to 3 allowed me to pull the bits of minky that were held down by the stitches back out and basically hid the stitches.
 I appreciate you visiting my blog today, I hope you have enjoyed all the amazing projects that have been shared over the last 12 days.  If you have missed them, you can find the schedule on the post prior to this one or on Sarah's blog at Confessions of a Fabric Addict.


Have a wonderful day!
~Brandy


Saturday, July 21, 2018

Schedule for 12 Days of Christmas in July 2018


Hello!  I am participating in the 12 Days of Christmas in July again this year, it already started last weekend!  I hope you will visit us all and come back to see me on Wednesday, there are many fun ideas as well as a quilt along being run by our host, Sarah at Confessions of a Fabric Addict.
 
Saturday, July 14th
 

Selina @ Selina Quilts

Sunday, July 15th
 

Monday, July 16th
Jamie @ L'Fair Quilts

Tuesday, July 17th
Sharon @ Vrooman's Quilts

Wednesday, July 18th

Thursday, July 19th
 
Danice @ Homespun Hannah

Friday, July 20th
 

Saturday, July 21st
Marian @ Seams To Be Sew

Sunday, July 22nd
Anja @ Anja Quilts
Moira @ Quilted Snail

Monday, July 23rd
 
Brenda @ Songbird Designs

Tuesday, July 24th
 

Wednesday, July 25th

Thursday, July 13, 2017

12 Days of Christmas in July - Tutorial and Giveaway

 
Welcome to the first day of the 12 Days of Christmas in July blog hop!  I am excited to share my pillow sham tutorial with you and hope you will also visit Carole at From My Carolina Home and Sharon at Vroomans Quilts to see what they have made.  You can see the full line up of blogs here.  If you leave us all comments on our featured days you will be entered to win a prize and there will be prizes for each day of the hop!  Be sure to also swing by and thank Sarah at Confessions of a Fabric Addict for putting all this together.
 
Pillow shams are a great way to use up scraps and practice free-motion quilting (FMQ). I made my pillow sham to fit a 16 inch pillow form, wanting something larger to cuddle with during the winter. Winter seems very far away at the moment with this 100° weather!
I used 1.5-inch strips of Christmas fabric to create strippy half-square triangle blocks that finished at 4 inches, then arranged them in a pinwheel pattern according to my husband's input (he said it made him happy, which is important of course).
 
I then basically made a table runner that measured 16.5 inches by 35.5 inches unfinished.  You can see I added a 3.5 inch strip to one end of my top, this was to make it long enough to overlap in the back.
 
 Here is a good shot of my FMQ.  I was able to do a continuous line pattern so I only had to bury a couple threads, a very nice time saver!
After your top is quilted, trim the batting leaving a quarter inch of batting around the edges.  Then bind the short ends.
 
Place the quilted piece right side up on the table. Fold the end that you want to see when the sham is turned right side out approximately 8 inches towards the center.  With the pattern I used I folded it two blocks width.
 
Then fold the other side in so that there is about a 3-inch overlap.  Again, with the pattern I used I folded two blocks width plus the strip.
 
 Here is a close-up of the overlap.
 
I have found I like to clip my edges together using Wonder Clips for the next sewing step because it's pretty thick with four layers of fabric and two layers of batting, and even more so where the flaps overlap.  Using a walking foot, sew a straight seam about half an inch from the edge (I used the edge of my walking foot as measurement).  Take your time as you go over the bound ends so you don't break a needle.  I also suggest backstitching a couple times where the bound ends are to strengthen where the sham will experience the most stress when putting the pillow form in.
 
Next, trim the corners down so that they will be less bulky when turned inside out.  Then sew a wide zigzag along the edge to clean it up and keep the fabric from fraying.
 
 Here is a close-up of my stitching.  The long straight stitch right next to the zigzag is my basting stitch, not the stitch to enclose the pillow sham.
 
 All that is left is to turn the pillow sham inside out!
 
 View from the back.
 
View from the front.
 
I hope you will try making a pillow sham using this method.  Send me a photo if you do!  My email is brandizzle7133 at gmail dot com.
 
Remember to leave a comment on our blogs as you visit to be entered in the giveaways.  There are twelve(!) prizes to be won!
If you need comment inspiration, how about telling me your favorite small, homemade Christmas gift to give or receive, I'm always looking for more ideas!
 
Merry Christmas in July!
~Brandy
 
 
And in case anyone was wondering where the quilt inspectors were during this process, well you can find them near a window, soaking up as much sunshine as possible!
 
 
Linking up to Let's Bee Social at Sew Fresh Quilts
https://sewfreshquilts.blogspot.com/2017/07/lets-bee-social-186.html


Saturday, July 8, 2017

Christmas is Coming...

Christmas in July that is!

https://confessionsofafabricaddict.blogspot.com/


I'm super excited to be participating in the Christmas in July blog hop this year, hosted by Sarah at Confessions of a Fabric Addict.  Here is the list of everyone who is participating with links to their page:

 Friday, July 14th

Saturday, July 15th

Sunday, July 16th

Monday, July 17th

Tuesday, July 18th

Wednesday, July 19th

Thursday, July 20th

Friday, July 21st

Saturday, July 22nd

Sunday, July 23rd

Monday, July 24th

Tuesday, July 25th
 
Everyone is showing different project ideas and some are having tutorials, it will be great to get a lot of ideas earlier in the year so we can all be ready for December!  Sarah is also having a quilt-a-long during the blog hop that looks great for using up some scraps.  Come visit me Friday the 14th to see what I make with this:
 
 
~Brandy