Showing posts with label picnic. Show all posts

Thursday, October 2, 2014

September Activities

Welcome back!  Oh man, this last month has been busy busy busy at work.  I am the National Rodeo Secretary for the National Intercollegiate Rodeo Association, (aka college rodeo across the USA) and the beginning of the school year has a lot going on for our office.  I kept thinking I wasn't getting anything done because of how very fast the month went by, but I actually accomplished some sewing!  One thing I practiced was getting into the habit of going to my mom's house every Wednesday to work on the quilt my Grandma Linda asked me to finish, and I'm so happy to report I've nearly half the blocks together already!  Here's an idea of what I started with:


And sadly I don't have a progress picture, but I will remember next Wednesday to have my mom take one of me working on it.
 
We had the Walla Walla Valley Quilt Festival mid-September and I volunteered for a few hours Saturday at the front door.  I had a blast hanging out with Lianne (our guild president) and one of the other girls who I just can't remember her name to save me.  John and I walked around Sunday for about 2 hours examining all the amazing works.  Here's my quilt hanging up, and my block challenge on the wall with the others, there were some really creative blocks:
 

I'm on the bottom row with the black background
 

I also participated in the APQ Pillowcase Challenge Sew-a-thon and using some fabric from Grandma Linda's stash made this awesome pillowcase:
 
This is made using the "burrito method" that is a free pattern on APQ's website (link above)
 
My amazing piecer: the 1954 White
 
Ta-da!
The most exciting thing was you could enter at some of the sponsors websites and win fabric to make more pillowcases, and I won!  I received an email from Shannon Fabrics a few days ago, and I plan on donating all the cases to children in Walla Walla, hopefully the children's ward at the hospital.
 
I have been so fortunate, won 4 drawings in 2 months now!  Can't wait to pay it forward in the upcoming blog hops.  By the way, I'm participating in not only the Black Cat Crossing, but also the T'was the Night, yay!
 
Here are photos of the items I won from Carol's drawing at Just Let Me Quilt:
Two yards (!) worth of solid and two fall panels


And then I received the package from Sew Lux Fabrics who I had won a $50 gift card from:
 
Ooo!  What an unexpected surprise!  I love presents within presents.
 
It really struck me how much more special this nice wrapping made my prize seem.  I am going to start prettying up my giveaways, because I can!
 
 
For the most part I ordered things I would not normally buy for myself, such as fabric with no plan or a bag pattern...
 
For some reason I was really drawn to purchasing this pattern after seeing all the amazing ones people have made and hearing how tough it can be.  Sometimes I like a challenge.  I'll probably take this on in a couple years.  I hear you also need ~$100 worth of materials to make it, so I'll start saving up too.

I also bought a spool of white Aurifil thread, because I go through it!  I really enjoy how smoothly it works in all 3 of my machines, I must say.
 
Ok, here's one last thing we did in September, we hosted a rock crawling event for remote control vehicles.  Some are very lifelike, some look like bugs, but everyone has a good time.
Getting in some stitching while at the track.
Our youngest competitor (pretty sure he's only 3 years old) driving a scaled truck through the course and doing really well.
John giving Terry some direction over a tough log section.
One of the competition (aka bug like) crawlers crossing the bridge John built.  I helped paint it.
 
See, John's working hard and I'm supervising.

 The event went really well, and we're hoping to keep building awareness over the next couple months for a good turn-out in Spring.

Thank you for visiting, see you again soon!

~Brandy
 

Thursday, June 26, 2014

Matching points and Y-seams: Assembling my picnic quilt

So sorry for the wait!  What's with this summer cold-thing going around, sheesh.
Anywho, here's some of the steps I took to make assembling my quilt easier:

This quilt was full of many firsts for me, as I mentioned in my Perfect Picnic post, and I'm very happy to share with you what I learned.
 
I made my star points scrappy for this quilt, in the future I probably will not undertake such a challenge as it is so much easier to make strips of the colors and cut them out from there, here's a really good video from Kaye's Quilts on youtube, she explains in the introduction:  Easy Double Wedding Ring
 
 
However, the way I chose to make this one was scrappy, and so I laid the pieces out in pattern pleasing to my eye, then stacked all the rows the same, starting from the outermost point and going to the right, stacking one on top of the other.  As you can see in the picture above, I made sure to take a picture of my layout when I got it where I liked in so that when I dropped a pile of pieces, and I numbered the points, then numbered my stacks to correspond to the points in the picture.


I made sure to keep them numbered as I sewed them together point by point, I was really paranoid that I would get them mixed up.

 
So my trick for getting matching points on my star is pretty easy to do, and I only wish I'd done it before I'd had to take out one of the seams about 8 times, HOWEVER, it is now engrained in me that this is the best way to do it (sorry, started complaining there, naughty naughty :P )
 
1. Make a mark 1/4 inch from the edge of the fabric (not diagonally along the seam!) on both pieces that you are sewing together, I actually went to each intersecting seam and drew my lines with my disappearing ink pen from Joann Fabrics.

2. Next take a pin and place it exactly through both pieces where the drawn line intersects with the seam, and keep it pointing straight through.
 
3.  LEAVING THE FIRST PIN STRAIGHT UP AND DOWN add two pins that cross each other and hold the fabric in place where the first pin was marking them, then you may remove that pin.  The pictures below show how my points turned out by using this method.


I know the bottom blue looks off point, I just hadn't ironed it flat yet, not entirely sure why I went ahead and took this picture...
 
See, that's better!  By the way, I was ironing my seams all down, and ended up re-ironing them when I attached the points together, so if you have to do so it's no big deal.
 
I followed the same matching procedure to sew the points together, and sewed point 1 to 2, 3 to 4, etc, then the 1-2 points to the 3-4 points and 5-6 to 7-8 to form the half stars.  I sewed the seams from the blues to the reds in the very center, I'm not sure if that's part of why my piece turned out perfectly flat, but it may be one reason.

This is one of the few times I ever sew a seam open, but I did so at the seam between points 2 & 3 and points 6 & 7 to help reduce the bulk at the very center.  Then I very carefully lined up the center reds of the two halves, and actually sewed from the center out on these seams, overlapping my stitches about an inch across the center.  Still used the pins to match the points on here as well.
 
You can see how nice and flat it turned out.  I actually was not aware that it could end up domed in the center, but apparently it can.  I'm guessing that as long as you keep your seams accurate (preferably 1/4 inch) and take your time then you should end up with a flat star.  I found out yesterday while talking to the lady at Highland Quilts in Athena, OR that if you do get a dome in the center, you can take a very hot steam iron and set the iron on the fabric, and the heat/water will shrink your cotton enough to make it lay flat!  She did also say it's a slow process, not to rush it, it will also distort your fabric if you are pushing it around a lot.

So when it comes to the corners and setting triangles let me give you my favorite lesson I learned from when I made my mom's quilt for Christmas:  make them at least 1" larger than you think the measurement should be!  On my mom's quilt I went with the exact calculated measurement (and only so much fabric to work with) and ended up having to stretch it into place and force it to work, which is not conducive to a relaxing quilting experience.  On this piece I added the extra inch, having convinced myself it would be okay to lose some extra fabric, and I was so glad I did.  Strangely I didn't trim that much extra off!  I had plenty of space to cut along and still leave the 1/4 inch allowance for sewing on my inner border, which was something I'd missed on my mom's quilt.
 
There are a lot of great tutorials for Y-seams (here is a great video: http://www.jinnybeyer.com/quilting-with-jinny/tips-lessons/detail.cfm?instanceId=71DAA699-0AFE-8A90-85D38BA999BD18D8), my biggest suggestion is be sure to mark your 1/4" from the corners and pin, just like with matching your points on the star.  Then start from the center and work your way to the outside edge.  Also, none of your stitches should overlap at that starting point, that will cause a pucker of fabric.
 
I hope you found some of my insights enlightening, please leave me a comment if you have any questions or if you have other tips, I always love to hear other tricks of the trade!
 
~Brandy

Wednesday, June 11, 2014

A Perfect Picnic blog hop WINNERS and my vege dip recipe

Welcome back and congratulations to the winners of my giveaways!
 
 
The bottle of wine goes to #65 BONNIE from MAQUOKETA, IOWA who said:
Love your quilt (both sides). I live outside of Maquoketa (fun to hear people try to pronounce this one, too), Iowa. Thanks for sharing and for the chance to win.


And this charm pack goes to #69 KATHY from ONTARIO, CANADA who said:
What a great picnic! Fantastic idea to bring kites... so fun!
Looks like you had a great time!
I'm in Ontario, Canada and am enjoying the blog hop so much!
 
You can visit Kathy at her blog: http://kathysquilts.blogspot.com/ she has some amazing projects she's worked on!
 
Emails have been sent and I am waiting for them to respond with their addresses.
 
I loved this blog hop and hope that you did too, as I've told a number of people it's so wonderful to be able to share projects and ideas and be able to inspire each other on such a grand scale.  Why, even Carla has a virtual bridal shower going on for her daughter (who is getting married in October) where we can share recipes with her, how awesome is that?!  I just love our quilting community!  And now here's my recipe:
 
 
Vegetable Dip
 
1 C sour cream
1 C mayonnaise
1 tsp Beau Monde seasoning
1 tsp dill weed
1 tsp chopped parsley
1 T finely chopped onion (or 1/2 tsp onion powder)
~1 tsp garlic salt
 
Just mix it all together, refrigerate for ~1 hour for better flavor but can also be used right away.  My husband uses it for chicken, tacquitos, burritos, etc. as well as the veges.  I like it best with carrots myself.  This recipe came to us from my Great Grandma Pawlik, and I've been eating it most of my life, so it's been around for at least 25 years (I'm 28).  I hope you like it!
 
Thank you for visiting, hope you have a wonderful day!
~Brandy

Tuesday, June 3, 2014

A Perfect Picnic (with TWO GIVEAWAYS!)

The giveaway is now closed and the winners have been emailed :)

Hello, and happy blog hop day!  John and I had a really nice time on our picnic, I'm going to tell you all about it in a moment and show you some pictures (ok lots, and this was me cutting back, it may take a minute to load).  And after I share our adventure, you will have the opportunity to enter one of TWO giveaways!  One will be for US residents, the other for our international visitors.
Also, be sure to visit our sponsors for this hop:
 
&


Here are the other who share this lovely day with me:
Wednesday June 4

 
Quilt
So first off, when I caught whiff of a possible picnic hop I was very excited.  I'd been making blocks last summer with the idea of using them for a car quilt, hadn't made any more progress on it since, and here was a golden opportunity!  It would also count as a busted UFO for this year which is so nice.  At the time the hop was announced I had all the outer blocks finished, I just needed to finish the center medallion and had already cut the diamonds for one.  And I'm going to toot my own horn on my point matching, because it took me redoing one of the points 6-7 times before I finally started marking and pinning them, and here's what you get when you do that:
 
Practically perfect!

Here's the center and top all put together:
 
 
In case you're wondering, the majority of the red, white, and blue fabric came from Keepsake Quilting, then I added some of the whites and the gray from my LQS Stash, who some of you may recognize as being a featured store in the latest Quilt Sampler.  The blue came from the quilt shop in Pomeroy, WA called Rather-Be's, who I discovered when we held my Great-Grandma's 90th birthday in their retreat center a month ago.  They carry a lot of fabric especially for Quilts of Valor.
Then I created the back out of jean material donated by my Grandpa Jim, Uncle Jerry, dad, John, and myself.  I actually used up the majority of my collection to make this, but that's ok, mom has like 4 bins of jeans in the basement that I plan on raiding in the future... ha!  Like she'd let me!
 
It was John's idea to mimic the front using the dark and light materials.  To get the light star points I had to turn my jeans inside out though, but it's jeans, you can't really tell it's the insides.  And I love how the checkerboard pattern looks!  Also, really liked how quickly the 6 inch points go together as apposed to the 2.5 inch.
This quilt has a lot of firsts for me in it: fussy cut, applique, flying geese, lone star, inner and outer borders, sashing, and working with jeans.  I also used a 1 inch thick poly batting I got at JoAnn Fabrics (it was on sale, 50% off), and it was way less expensive than buying multiple precut battings ($7 vs $60, totally worth it).  I am going to write another post in a couple days that will chronicle more of the making of this quilt, so be sure to come back and visit me for a more in-depth look, and some good pointers I have for the whole Y-seam and point-matching adventure.
 
Basket
Apparently I needed to explore the Peterboro Baskets website more thoroughly because I sure wish I'd gotten our basket from them!  Especially since they are so generously offering a discount right now (20% off use QUILT as your coupon code thru September 30th) and it's free shipping in the US.  They have a picnic basket for two that I would really love to have, and will probably pick up here in the future.
We found a basket from Hobby Lobby that cost almost the same, but the quality is really lacking, especially in the strength of the handle.  However, we made do!  The post previous to this one shows how I made a reversible picnic basket liner for it.  Here's how it turned out:


Menu
For our menu we decided to take a bunch of snack-type food since a full meal wouldn't be a relaxing for us.  I found a mini watermelon, summer sausage, a party cheese mix that I cut up myself, we had a bunch of Ritz crackers already, some Easy Cheese for me, pretzels, carrots and homemade vege dip (I'll share the recipe in another post) and Coca Cola in glass bottles:
This Pampered Chef cutting board is the perfect size to take on a picnic, and their knives all come with protective cases too.
I may be a Pampered Chef consultant, but I do love my Tupperware as well!
It all looks so festive loaded in the basket!  Oh, that white lid is covering some M&M's I took along and never ate, I'm actually eating them as I write this post!
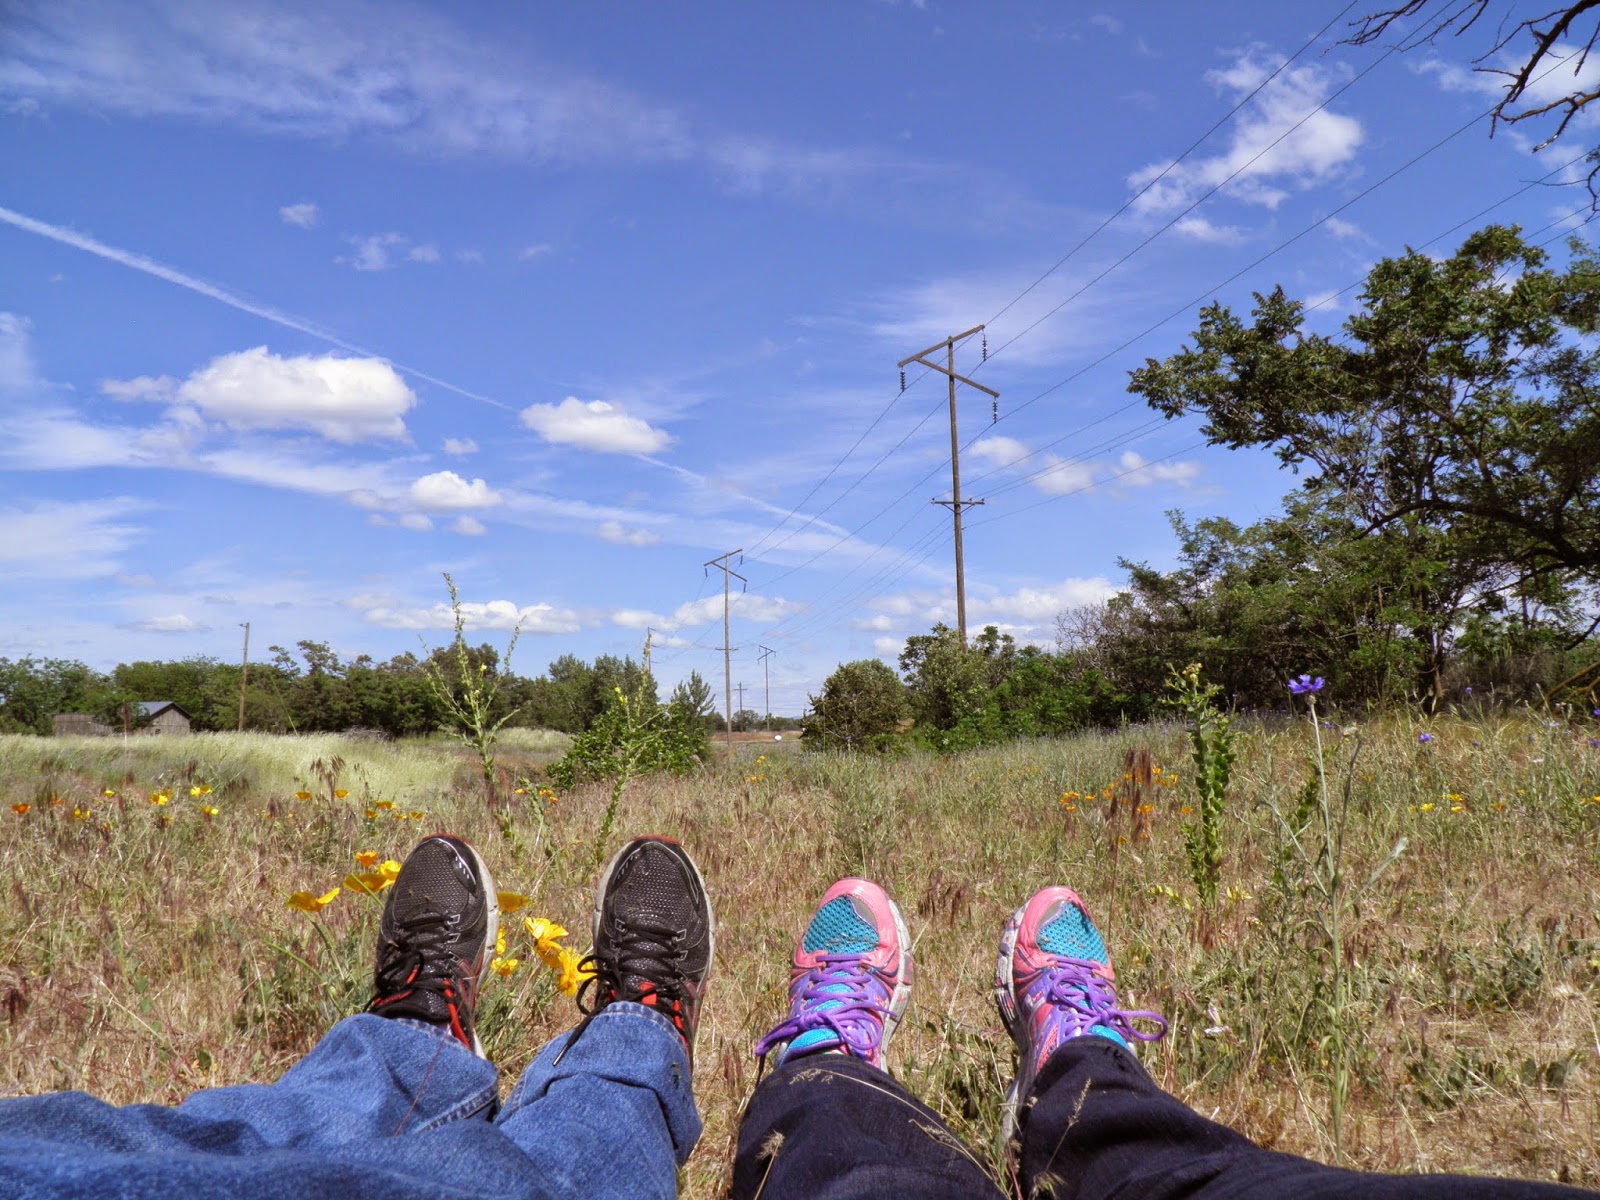
Picnic
Setting up on the banks of Mill Creek :)  This is the back part of my parent's land, we affectionately refer to their land as Rocky Acres.  You can see how pretty the California Poppies and Bachelor Buttons were that day.
We were concentrating really hard on getting our colas to clink hahaha

A lovely snack plate.

John splashing around, it was ~80 degrees, so this was very cooling he said.

I chose to lay on the quilt and eat some more while he played in the water.  The pillow was a good idea to bring along, next time we'll take two.

Enjoying the breeze.

Wait!  A breeze?  Why, that's why I have kites!  So we busted out this Americana one my grandmother actually MADE, and I promptly broke it.  Now I need to find a new spar, we may be in for a road trip :)

Fortunately I brought more than one kite, so we still got to fly for a while.

This was John's second time flying, he's a quick learner.
It was nice to take some time for ourselves with no plan, just to go out to the property and do what we please.  We had also brought along the cribbage board to play but it was too breezy for cards to be laying about this time.  We'll try again this weekend.

GIVEAWAYS!!
 

Giveaway #1 - United States only (see stipulations below)
OH YES!  You're seeing this right, I have for my United States viewers this very lovely, local, bottle of Riesling!  I live in Walla Walla, WA, and we are becoming very well know for our wines.
I do have some stipulations however, as shipping is pretty strict for wine.  As I said before, this is limited to United States readers.  And I am unable to ship to anyone in Massachusetts, North Dakota, New Hampshire, and Utah.  And it's very important that an adult be there to sign for it's arrival, because if it gets returned to me I'm not trying again, I will keep it and will use it to cook with.  (I understand some people view this as sinful... lol)
 
Giveaway #2-International and MA, ND, NH, UT residents
One of the most summer-rific charm packs I could find!  Bartholo-meow's Reef by tim&beck for Moda.  I think this is just too much fun, and it's both boy and girl friendly if you use the right filler colors with this charm pack.  I can't get over that walrus's smirk heeheehee!
 
OK!  Here's how you enter:
Leave me a comment with your city and state/country.  You may also feel free to leave kind words, I always love that of course.  And I shall do my best to respond to you all!  This giveaway will be open until June 10th, and I will use the random number generator to do my drawings, then contact the winners on the 11th.
 
Thank you for visiting, I hope you'll stop by in a few days for my post on making my quilt, and remember the post below shows how I made my picnic basket liner.  Have a fabulous summer, I bet I'll see you in July for some Christmas happenings!
 
~Brandy