Showing posts with label rainbow. Show all posts

Saturday, January 5, 2019

2019 - Back in action

Welcome back!

I just have to laugh at myself, I have been that person with the "best of intentions" when it comes to posting updates and yet I get so busy I just clean forget!  So here is some eye candy:

Rhonda's Elephant Abstractions quilt that I custom quilted for her.  She delivered it in person to her daughter in New York and her daughter loves it!

I had a great time figuring out motifs with Rhonda, we ended up picking out favorites from photos of finished quilts on Instagram and creating a unique design.

This was the first king size quilt I loaded on the longarm and I free-handed loose swirls on it for Anita.  I was really impressed with this quilt, the interlocking chains look so cool, and the simple quilting let the piecing shine.

This beauty made by my cousin Mary V. for her granddaughter was so wonderful to work on, there were new things to experience such as rouched fabric, applique, and dense quilting with a minky backing.

This minky looks and feels wonderful, even with the tighter quilting.

Business is going quite well, I have been able to make the payments on the longarm from money made on quilts for the last 3 payments, so I am beating my goal of making payments by the 2nd year of business!  I have gotten to work on some incredible quilts over the last year and am so thankful for the supportive quilters in my area. 😘 


And I am so happy to have my quilting area more complete, we added a white board (to track projects), a cork board (to hang my rulers), and new lighting which is really helping my eyes as I am in the basement.

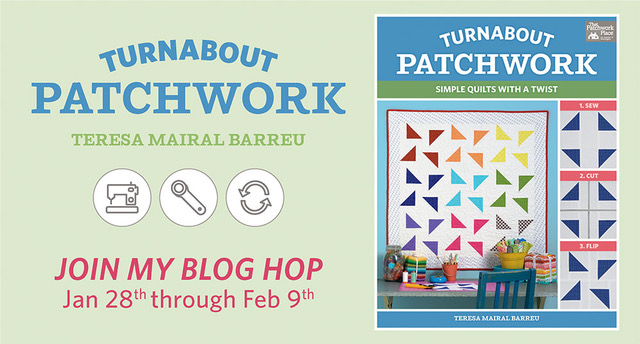
I get to start this year off as part of a blog hop featuring a new book from Martingale:


I am excited to share my blocks with you all and to see what everyone else does with all the neat options Teresa has layed out for us.
Teresa can be found at mypatchwork.wordpress.com.


Thomas and Belle are quite attached to this quilt I made this year as part of a jellyroll competition.  It needs it's own post so you can see the quilting, but I will tell you that Hobbs wool batting is awesome.  And that may be why the cats love this one so much.

Have a super sparkly day!

Brandy

Friday, October 13, 2017

Splash of Color Quilt Along

Good morning!  I have decided to join in the  SPLASH of Color Quilt Along with Myra at Busy Hands Quilts and I hope you will join in too!  The rules are quite relaxed, pick out some black and white fabric, a color (or 26 in my case) and any quilt design you would like.  Then link up pictures of your progress every two weeks at Busy Hands Quilts.  You can click on Myra's blog name to visit her site and get more information.
 
I was really lucky to receive Jackie Kunkel's book Splash of Color as a prize for a FMQ quilt along in 2015.  The first quilt that really caught my attention was Star Bright, the 7th quilt in the book.  I especially love the "alternate" version using the darker background fabrics.  I started collection 1/2 yard pieces as John and I travelled around and this year realized I have enough to make a nice scrappy quilt.  Then this quilt along popped up and I decided it is meant to be!  I had also been collecting a bunch of brilliant colors for another quilt idea, but decided they will work better for this.  Some changes I am making to the pattern include reversing the color placement, thus all the blues in my pile, they will be the outer border of stars.  I am also not going to paper piece this, first I didn't want to make all those copies, and second I want this to fit our king size bed and the pattern currently finishes at 88 inches.  I did a test run that you will see below and my blocks will finish at 7.5 inches, meaning my quilt will be 105 inches square!  I am also contemplating making the squares between the star rows into 4-patches, but will wait until I have finished the stars to make that decision final.  There are a lot of stars to make first and I may not want the additional work afterwards LOL!

So a new thing in my life (literally as of a week ago) is this phone.  My father forced me to upgrade to a smart phone when he found he could not send me a smiley face.  The first app I added was Instagram, so I am going to attempt to post occasional photos on there between our linkups for the quilt along.  My IG name is @pamperedpettit if you would like to see other photos.  I do like the ability to take the grayscale photos easily with this phone, that is a great tool for me.  And I had a lot of fun assigning funny ringtones to my family.

Here is my practice block, it's not terribly accurate color-wise as to what the stars in the quilt will look like, but the size and construction was what I was after.  The blocks in the book finish at 6 inches and as I mentioned before this block finishes at 7.5 inches.  I'm pretty excited about this and am starting to understand the allure of scrappy quilts, I am pretty smitten with this block right now.
 I hope you will feel inspired to join in too, the first linkup needs to be added before October 17, so don't take 3 weeks to make this decision like I did HAHAHA!
 

Splash Quilt Along @ Busy Hands Quilts
 
 
Have a wonderful day!
~Brandy
Thomas approves of this message and encourages snuggling into a cozy blanket or quilt as we move into colder weather.


Tuesday, July 25, 2017

Craftsy Class Review - Startup Library: Quilting with Christa Watson plus 50% Discount Code

Oh boy, do I have something exciting to share with you today!
 
Photo courtesy of Christa Quilts
I got to take Christa Watson's new class on Craftsy called Startup Library: Quilting and it was so much fun.  Craftsy classes are neat because once you have them in your class library, you can watch them as many times as you want and they are available forever!  This is definitely a good thing with this class as there is a lot of information given in the first couple lessons, and it is worth watching a couple times to pick up on things you may have missed.  Another nice feature with the classes that you purchase is that you can ask questions and the teacher will actually answer them, so you know you are getting expert advise.
 
Photo courtesy of Christa Quilts
This class is fantastic for beginning quilters who are looking for clear step-by-step instruction and knowledge.  The class consists of 14 lessons with nearly 6 hours of instruction.  There is a printout that breaks down the lessons into all the steps Christa talks about and demonstrates, with the times during that lesson so you can quickly re-watch a step when needed.  The printout also defines many of the processes and lingo used in quilting and has the pattern for the quilt made in the class which is called Friendship Stars (shown above). 

Photo courtesy of Christa Quilts
I enjoyed a lot of things about this class.  The camera angles used, the close-up view during processes, the simplicity of the pattern, and the fact that as an experienced quilter I actually learned some new tricks!  That makes this class a worthwhile investment to me. 
 
Photo courtesy of Christa Quilts
 My favorite trick that I am excited to use is her basting technique.  You just need one table, a can of basting spray, a large ruler (such as a 6 inch by 24 inch), and a well ventilated area.  And depending on the size of the quilt, a helper.  :)
 
Photo courtesy of Christa Quilts

Christa is well-known for quilting on her home sewing machine.  She walks you through using both your walking foot and free-motion quilting as options for quilting your quilt. 
This class literally takes you from barely knowing what quilting is to fully creating a quilt!  And as I mentioned before, this class is certainly useful for an experienced quilter as well, there are always new techniques to try out.  I hope you will also hop over to Christa's page and read some of the behind-the-scenes that she has on her post.
 
Now, one of the things Christa says early in the video is to "take what you learn and make it your own".  I have mentioned before that I have a tendency to switch things up in a pattern, I'm not sure that I've made a pattern completely to the letter of the instructions since I began quilting.  I even changed up a block in the very first quilt I ever made!
 
That being said, here is the top I made this weekend:
 
I went with a Sawtooth Star in place of the Friendship Star and decided to make 9 blocks instead of 25.  I love how quickly it came together, simple 12 inch blocks are the best.
At first I thought I would be donating this but it's not going to happen, LOL, this is definitely staying with me!  Every time I see it I do a happy dance.
 
 
I am still figuring out the border, I only have that little scrap of blue left so I wanted to plan the border around it.  I may add another cream border after the pieced border also, then use the center star's fabric as the binding.  And depending on how much jean material I have left after finishing my sister's quilt, I am thinking a jean backing for this one as well.
 
Now, I have a special code for you to be able to take this class at 50% off the regular price, how great is that!  Follow this link http://craftsy.me/2v4ZQeF and it will add the discount to your cart.  The discount will be reflected once you click "Buy Now".  The discount is good through October 8th, 2017.
 
Thank you for visiting, have a wonderful day!
~Brandy

Friday, February 10, 2017

60° Rainbow Diamond Block Tutorial

Hello everyone and welcome!
 
This is a tutorial for setting 60° diamond blocks with 30° background pieces for a 12.5" block that looks like this:
 
 
I am not explaining how to make the 60° diamonds in this tutorial, but I do offer tips for how to get matching points on them.  Here is a great tutorial for making diamonds  (45°) at the Moda Bake Shop, be sure to make your cuts 60° if you use their tutorial.
 
Recommendations:
 
- use a small stitch length (1.7 on my machine, ~15 stitches to the inch)
- press your seams open as much as possible to reduce bulk
- use Mary Ellen's Best Press or starch on your fabric BEFORE cutting, as the majority of this block is assembled on the bias
- you will need a ruler with a  30° and 60° line on it (standard on most 6" x 24" rulers, I have one of the Olfa Frosted rulers)
- you will also need a large square ruler that will give you a 12.5" square
 
Fabric Needs (for one block):
 
(8) 2.25" x 6.5" background pieces
(1) 8.5" x WOF background, sub-cut into (4) 30° triangles (explained below)
(4) 60° diamonds (I made mine from 2.5" strips cut from various fat quarters).
 
 First, you want to make your diamonds.

 
To get your points to match, take two pairs of diamonds and line up your pieces so that the seams meet as shown above.  In my case the light green and the dark green seams will be aligned.  You will also see on either end little tips sticking out, similar to the jeans photo below.
 
This photo is from the backing of my niece's quilt I made in 2016 :)
 

 I like to pin the points like this, it helps keep the fabric from folding under when being pushed/pulled by the feed dogs on the sewing machine.  After sewing this seam, press your diamond open.
 
 Fold the 8.5" background strip in half and trim the unfolded edge so the ends are even.  Line up your ruler as shown, with the 30° line along the cut end, and cut (2) triangles.
 
 Move your ruler to match up the other 30° line on the cut you just made and cut out another (2) triangles.
 
 Decide which point you want to point to the outside of your block, and place one of the 2.25" x 6.5" rectangles on it, letting the extra hang over the end that will be the outside corner.
 
 Sew and press open the background and trim off the excess even with the diamond.
 
 Now place another 2.25" x 6.5" on the other outside portion of the diamond and sew on.
 
Press open the background and trim off the one end as indicated in the photo.
 
 Take one 30° triangle and mark the small pointed end about half an inch in, then line up the inside diamond with the marked point so that when they are sewn together, the background triangle will be on the right side of the diamond.  Sew the pieces together from the inside point out.
 
*If you sew from the outside in, your points are far more likely to become uneven and create a mound in the center*
 
 Press the seam open and trim off the excess INNER point, do not trim the outside away.
 
 If needed, trim the background to be about 1/8" from the inner point of the diamond.
 
 
 Repeat for the other three diamonds.  The centers should look as if they are slightly off-center, this is to account for the next seams.
  
Sew the quarters together, again from the center out.

The points should look like this.
 
 Then sew the halves together.
 
 Your block will look similar to this now, a little rough around the edges.  :)
 
 Now square up the block by aligning the points with the 12.5" marks on your ruler.  This block happened to match perfectly on all four diamond points, my next one did not, but there is plenty of background to still get a 12.5" block.  And it still looks great!


I have a total of five blocks made so far and plan to get up to nine in the future, but have a number of previous projects to catch up on first.

If you make this block I would love it if you send me a picture (brandizzle7133 at gmail dot com) and feel free to ask questions or leave suggestions if anything is unclear.

Have a wonderful day!

~Brandy

Linking up with:

Let's Bee Social
 

Finished or Not Friday at Busy Hands Quilts

Sunday, July 17, 2016

Sisters, OR Outdoor Quilt Show

John was so kind, he took me to Sisters, OR last weekend for the Quilt Show!
I actually booked our hotel room in January, so I've been really looking forward to going down there.  It's about a 4.5 hour drive from Walla Walla, so we left Friday morning ~8am, which gave us plenty of time to visit one of John's work buddies in Bend for about an hour.  Bennett at Performance Authority is building the SEMA truck for Diamond Eye Performance and we got to see it's progress.  The following are some photos from our trip, and just a few of the quilts that really caught my attention.
 
It started as a '48 Ford cab-over, which they are creating a truck-loading ramp for so it can haul another custom truck.  It will be really neat to see it progress, and John is very excited to be helping out with the project this year.

Eee!  So excited!


Hmmm, not so great, although it still is Friday, so go ahead weather!  Get it out of your system!

Pretty great store!  During quilt show time they stay open from 9am to 9pm.  We were thankful the next day that we visited Friday evening.

Lepidoptera Quilt

This hit my funny bone :)

John got this good photo of us as we were on our way out, in front of a beautiful water feature.

This is where we ate breakfast, I highly recommend it!


Neat sculpture in a field before you get to Sisters, for those who get to wait for entrance into the show.

I think we only waited 10 minutes, it wasn't too bad at 9am.  I heard you can actually go earlier, when they are setting the quilts up, and the traffic is much less.

I thought this picture turned out really nice, and might make a neat quilt someday.

This is in City Hall, all the panels are quilted by different people.

This looked like one I would be most likely to imitate, if I ever decided to make something along these lines.  We really liked the progression of the quilts.

This may be the best memory quilt I've ever seen, what a cool idea!

This was incredible, those little squares are .5 inch (half inch!) and then it's all embellished with beadwork.

Here's a close-up.

This was one of John's favorites, which made sense to me because he likes war planes and clever quilting.

Such a cool idea.  What a great way to practice different quilting techniques/patterns.

An example of the quilts hanging on the buildings.  And me :)

This one is amazing.  I really like the cream background and rainbow batiks.

Had to try on a floppy hat!  There were some pretty fancy ones at this shop.

I haven't seen many log cabin quilts that really attract my attention, and this one definitely did.  I like the trees and bear paw blocks a lot.

I saw this tiger from across the street and squealed a little... I love how it looks like he is nosing up to the camera!


Pretty awesome to meet Rob Appell of Man Sewing!  Hoping to take a class with him next year if possible.

Another shot of quilts on the building, and an example of why John and I walked in the middle of the street for most of the 4 hours we were there.

This log cabin quilt is clever!

Be sure to visit the flaming rhino!


We visited the shops in Bend after walking around the quilt show, and found a few goodies.  I decided I will work on a rainbow of fat quarters from the shops I visit this year and see if I can't make something fun with them.  And you can see John found some more motorcycle fabric, he is very happy.

I ended up with a yard of this for adding to my Halloween collection that I am building up, I think it will make a really cool background fabric.

I am contemplating using this for a new ironing board cover, but may go with something less busy since I tend to take a lot of my block photos on there.  Either way, I was really attracted to this fabric.

John bought me the earrings and magnet, how thoughtful is he!  And I have some fabric waiting to become Hawaiian shirts, and figured I should pick up the snaps while I was thinking about it.
 Our overall impression of the show was that it could have been a little less spread out.  We walked around, pretty quickly, for 4 hours and were just wiped out from it, and didn't see everything!  It is my understanding that in the past the quilts were much more condensed and it caused a lot of overcrowding, and that certainly wasn't a problem this show.  But we were among the younger end of the people attending the show, I can't imagine how the older crowd fared.  But it was pretty cool to see so many different quilts, and to see the appreciation of them from such a large amount of people.  I am looking forward to going back next year.  And maybe I'll enter a quilt this time!
 
 
Belle approving the new rainbow pretties.  I think she wasn't too thrilled with us being gone for a night, she still hasn't fully forgiven me.  I think I will brush her extra, maybe that will help.
Have a super sparkly day!
~Brandy