Showing posts with label baby. Show all posts

Thursday, June 11, 2015

Two UFOs down!

Woo!  Let me tell you, it's not easy for me to not start new projects.  But I've been trying really hard to focus on these UFOs, and so far I'm doing pretty good!  I got the Attack Cat and the bright star baby blanket finished, and will be passing it on this evening to Cathy.
 

I made the above nice and big so you can see how my quilting made some great snuggly crinkles :)  I am so please with how comfortable this quilt turned out after I washed it.  I will definitely use more flannel in the future!

Neat label I made, it's a hexagon while the quilt is an octagon, let's see how long it takes baby's family to realize it!
 
Finished at 36"x40" with the 2" green border added to it.

This is pretty much the first time I've worked with a panel, as far as I know, and I decided to do basic outlining.  Not as easy or quick as one might think!

 So, I get the Attack Cat finished in ~5 hours right, and take it to guild Tuesday night to turn in.  Remember, it was a challenge put out to the members to take the panel and practice our quilting/piecing for borders/whatever then bring it back this month and we'd vote on who's was best liked.  Well, I was the only one who grabbed one, and since I actually finished it they gave me all the rest as well as the original prize of the 3 fat quarters!  I'm excited because they said I can keep one of the panels for myself, which I plan to do and create a larger lap quilt with it.  And my favorite color is blue, so it was a perfect prize for me, plus now I get to create 3 more donation quilts to practice FMQ on again.
 
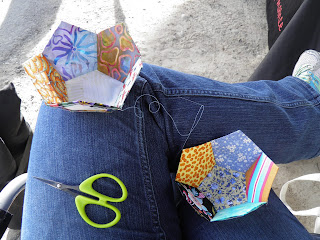
I did deviate a little in starting a new project, HOWEVER, it was because John and I travelled a total of 16 hours this last weekend for a vendor event for his job, and then we were sitting at said event for 12 hours.  So I made a soccer ball:


And here is an idea of the Diesel Dyno Days at Adrenaline Performance this last weekend:
Our booth, my husband designs diesel exhaust systems for Diamond Eye Performance and they allow him out for a couple shows a year, our other show was at BD Diesel in Abbotsford, BC (Canada) about 3 weeks ago.


Cam and Terra are the owners of Adrenaline, and they are the most wonderful people.  This was our third year of attending, and I have decided they deserve a quilt.  Turns out their colors are red, black, and grey, how awesome is that!  I've seen some amazing quilts with that color scheme.  Pretty excited.
 
We stopped ~20 minutes outside of Baker City, OR at this abandoned factory to take photos of the show truck, just for the heck of it.  It was amazing, but also 95 degrees so we look forward to returning at a later date for more exploration.


UFO Challenge List:
1. Bright start baby quilt FINISHED 6-5-15
2. Ashley's quilt
3. Attack Cat FINISHED 6-9-15
4. Football Pillow
5. Fabric Basket
6. Big Fish Little Fish
 
Loving the progress, yay me!  I hope some of you are also encouraging yourselves to have that sense of completion.  I am definitely struggling with not starting something new, but find if I jump a little from one UFO to another (as long as it's on my list) I get enough variation in routine to satisfy most of the cravings.  Now if I could just stay away from cookie dough I'd be great!
 
Oh!  And I completed my Snapshots apron quilt block two days after they released the pattern, I just spaced putting it up a couple posts ago:
I have more to say on the theme of aprons, but really need to get to eating some lunch now, so I'll tell you about it later.  I'll tease you with a number though: 8. 
 
Have a wonderful day!
~Brandy
Belle says it's too hot, I'm going to take your sewing chair, hope you don't mind...


Monday, June 1, 2015

UFO Busting with Pat Sloan

I'm taking on the challenge Pat put out this weekend, and have pulled together actual UFOs in my sewing room.  I've made lists all year, but most of them include piles of fabric waiting to become quilts, and those technically aren't unfinished, as they haven't been started yet.  Right?  Hee hee :)
 
So here's my goal for the summer:
 
 
1. This is the baby blanket I've been working on for 2 months now.  If I'd wanted to give it to them I could have a month ago, but I wanted it quilted because my hope is for it to be well loved and dragged around.  So number one on the list, baby Scarlet was born last Monday and is ready for her blankie!

2. This is a marriage quilt (they will celebrate their 1 year anniversary this month, congratulation Ashley, I love you!)
 
3. This is a guild challenge, there are four of these panels and I was the only one who picked one up.  So if I finish it and take it back to guild next Tuesday I will win the prestige of finishing it on time LOL!  Possibly there is a prize too, but we're making them as baby blankets for donation, which is pretty satisfying in itself. 
 
4. I started this pillow design the night before the Super Bowl, and mainly hope to have it done by football season this fall.
 
5. This fabric basket needs unsewn on the corners, quilted more densly, sewn back together and have the buttons put on.
 
6. Big Fish Little Fish wall hanging, just keep swimming!

I started working on this last night, made it through 5 of the star points before we had a lightning storm come thru and I stopped to watch it instead of sewing.  Plus the power flickered and I feared for my sewing machine.
 
Good job gloves, you hold that in there for me 'til I get home tonight.
 
The cats watching the storm with me last night.
 
So there we are, 6 items on the list.  And the hope that I won't decide to start another!  Except one thing, I get to test a pattern for Heather at Quilts Actually!  Very exciting, this is my first time testing a pattern, and I just love this one.  I'll share when I have permission to :)
 
Have a wonderful week everyone!
 
~Brandy


Saturday, August 9, 2014

Baby Shower Cakes

I am so thankful for my ability to take a fondant design and make it happen in frosting.  I just dislike fondant.  It tastes funny, has a weird texture, and I want people to enjoy eating what I make, not just enjoy how it looks.  So thus far, I refuse to use fondant on my cakes.  However, it hasn't stopped me making some stinkin' cute designs!  A friend from high school saw pictures on my Facebook page (one of the few reasons I'm still on Facebook, people can see what I'm capable of quicker) and called me about making a couple baby shower cakes for the same weekend.  She's a darn good friend, hosting two separate showers in one weekend, and travelling over 5 hours across the state to do so!  The first shower didn't really need cake, but she wanted to have a cupcake bouquet to give the mom-to-be, so I made this:

I was told the theme was "rustic country" and I felt the cup fit that really well.

The other baby shower was jungle themed.  We sent pictures back and forth and finally decided to use this one as a pattern:

http://www.cutest-baby-shower-ideas.com/jungle-animals-baby-shower-cakes.html
This sure is a cute cake, but as I said, no fondant.
 
This was a new trick for me, I don't often have cakes that have multi colored backgrounds.  I left the background a little rougher than I normally would because I knew there would be foliage to help cover, plus it's the jungle!
 
Outlining the giraffe.
 
 
Working the monkey, they sure look funny without eyes :)
 
I just had to throw a vine in to see how it would look with the leaves.
 
And I allowed the monkey to have a banana, because I'm nice like that.
 
A baby elephant joins the party.
 
Monkey finished!
 
Elephant finished!
 
Giraffe finished!
 
And foliage finished!
 
I made sure to have a picture of the cake without writing so people can see it and imagine their own message in the blank space.
 
Also, it was an amazing change when I added those darker green leaves, the cake looks so much better for them!  The original designer knew what she was doing for sure, and I appreciate being able to learn from her.  Every time I would catch a glimpse of this cake out of the corner of my eye I would squeal a little because it turned out so well!
 
And all done!  The blue is Wilton Sparkle Gel I had leftover from being used in a pond on a construction themed cake.  The only thing I dislike about the gel is that it doesn't harden, which makes putting plastic wrap over the cake nearly impossible.  Fortunately I have a cake container that I bought from the grocery store that this was able to fit in, which protects the cake from dust.
 
The most amazing thing about this cake is that it is a white cake, and I don't like the taste of white cake (I'm a chocoholic) but this one was delicious!  I used Duncan Hines cake mixes, and had farm fresh eggs on hand so I used them, and I think the eggs made the difference.  And my friend told me the girls at the shower couldn't believe she didn't pick the cake up at a bakery!  Their so kind.  I'm glad they enjoyed it as much as I did!
 
So, in case you're wondering, I used 2 Duncan Hines White cake mixes, made two batches of frosting, used at least 8 different tips, and this took ~5 hours to decorate.  This is a single layer cake, and serves 15-20 people.  I have decided I need to re-evaluate how much I charge, as I definitely didn't take into account the time consuming nature of having 8 different colors (the pink roses were made at the same time) and getting them all mixed together added an hour to what I forecasted.  I learn something new every time I make a cake!
 
Thanks for stopping by!
~Brandy

Monday, March 10, 2014

Pacifier Keeper - QUICK baby gift

Here's one of my favorite things to make for my friends who are having babies, a pacifier keeper.  They are useful, they save money because you (or your friends) won't have to keep replacing pacifiers that baby tosses away, are inexpensive to create, and as the title says, quick to make!
 
 
 You will need:
 -1 pack suspender/mitten clips (comes with two, shown a couple
     pictures below)
 -either 12 inch pieces of jelly roll strips or enough fabric to cut a
     2.5 inch by 12 inch piece
 -Velcro by the yard (you use less than 1 inch per keeper)
 
 This picture shows the length of a keeper fully laid out, they are closer to 9 inches when shut.  You can see I used two fabrics to make this one long enough to wrap around the pacifier ring and still be able to clip to the babies clothing.
 
Cutting my 2.5x12 inch piece of snuggle flannel.
 
I don't usually care for directional fabric, but it worked out well in this case.
 
Here's the clips I have been using.
 
First you want to fold the piece in half right sides together.
Then you'll want to make sure the strip will be able to fit through the clip.
 
And the openings on these clips are about 1 inch wide.
 
I also cut my Velcro a little less than one inch long.
 
I am sewing my strip a bit wider than 1/4 inch to be sure the finished size will be less than 1 inch across.
 
Then turn it inside out in whatever manner works best for you.
 
On this one I used one of my crochet hooks.  I was able to get the hook to grab onto the fabric I had turned under with my fingers, and pull it the rest of the way through lickety-split!
 
This particular hook is size "H".
 
Then press your fabric flat.
 
Next sew 1/8 inch away from each edge for a nice, finished look.
 
Like this!
 
Next you thread the end through the clip, and fold it over about 1/2 inch.  I only pinned at this point to take this picture :)
 
I chose not to turn the end under here, instead I just used a zig-zag stitch to hold it together and keep all the loose end threads from unraveling.  And just so you know, I personally went over this part 3 times, because I know how babies will pull on things and I don't want this to come apart.  You could also baste it in place first, and then run a zig-zag over the top.
 
Here is how that end looks when you're done.
 
On this other end you will first sew the end of the fabric closed, either by folding in under or just run a zig-zag over it.  Then cut the rough side of the Velcro shorter than the soft side to allow for a bit of adjustment around the pacifier ring.  Next sew the rough side all around the edges, placing it about 1/4 inch from the end of the fabric strip.
 
Now place your soft side about 4 inches from the edge of your rough side and sew all around the edges, feel free to back stitch on the sides for extra security.
 
Here you can see where I sewed around the Velcro.
 
And here is the finished product!  I hope you make someone's life easier with one or two of these, I've even got a couple that are holiday themed, just because!