
Welcome to the final day of 12 days of Christmas in July 2018, hosted by Sarah at Confessions of a Fabric Addict! Thank you Sarah for hosting this and letting me participate.

I have been having a lot of fun working on my project, and I have a tutorial for you today. I hope you will also visit Susan at Quilt Fabrication and Jean at All Points of the Compass to see their projects this year.
When I first got my longarm last November I wanted to see how well it worked with different fabrics so I bought a yard of satin and stitched out a pantograph.

When I first got my longarm last November I wanted to see how well it worked with different fabrics so I bought a yard of satin and stitched out a pantograph.

The satin stitched out beautifully! I showed everyone in my family because I was so excited with how it turned out. Then they asked me how I planned to use it. I had actually thought that through beforehand (for once!) and was able to confidently reply, "Stockings!"
 |
| Aren't they beautiful?! I am so happy with how they turned out and am really looking forward to making some more in other colors (I just pulled silver satin with a Christmas lights pattern off the machine yesterday and I plan to do red satin with a holly leaf pantograph next). And the most exciting thing happened while stitching out the snowflakes on the blue fabric, I hit one million stitches on my longarm! Celebrations are in the works, you will have to check back next week to see what we have planned... |
STOCKING TUTORIAL
The great thing about stockings is that they come together quite quickly, once the quilting part is done. And because I quilted the satin with a muslin backing I did not feel like it needed a lining, so one less step in the process. If you are not comfortable quilting satin yourself or are not set up for pantographs, you could always ask your longarmer to quilt some up for you, or you can contact me! My website www.bluespoolsewingroom.com has my information if you are interested.
For this project you will need:
quilted fabric for the stocking body
minky for the cuffs
white fabric to line the cuffs
cord for a hanging loop
Disclaimer: this tutorial is a generic how-to, there are no exact measurements or templates. This allows you the freedom to make a stocking in whatever size suits your needs. :)
 |
| I traced my current stocking onto a large sheet of paper and added a quarter inch all the way around to create a template. |
 |
| You want to be sure to cut out your pieces so they are facing opposite ways. Put them right sides together and sew a quarter inch seam using a 2.0 - 2.5 stitch length. Cut notches into the toe and heel curves to help ease the curve when you turn it right side out. I used my pinking shears to do this. |
 |
| I also did a zig zag stitch along the edges after sewing the two halves together so it will not fray quite so much. |
 |
| I decided to use some fluffy minky for the cuffs, and I highly recommend putting painters tape on the fluffy side before cutting to keep down the nastiness that usually comes with cutting this apart. FYI, putting the tape on the back side does not help. Ask me how I know... |
 |
| When measuring for your stocking cuff, make sure to measure across the top of your stocking after you sew the halves together, multiply the measurement by two, and add half an inch to that amount for seam allowance. I also found I needed to add a lining to this as the dark color of the stocking showed through a bit. |
 |
| I cut the lining the same size as the cuff, then sewed along one long edge using a quarter inch seam. |
 |
| Then I top stitched about 3/8 inch up to keep it tidy. |
 | ||
| Then I turned the stocking right sides out, basted the hanging hoop an inch from the LH side (loop will be between the cuff and stocking and pointing towards the inside of the stocking) and then inserted the cuff.
|

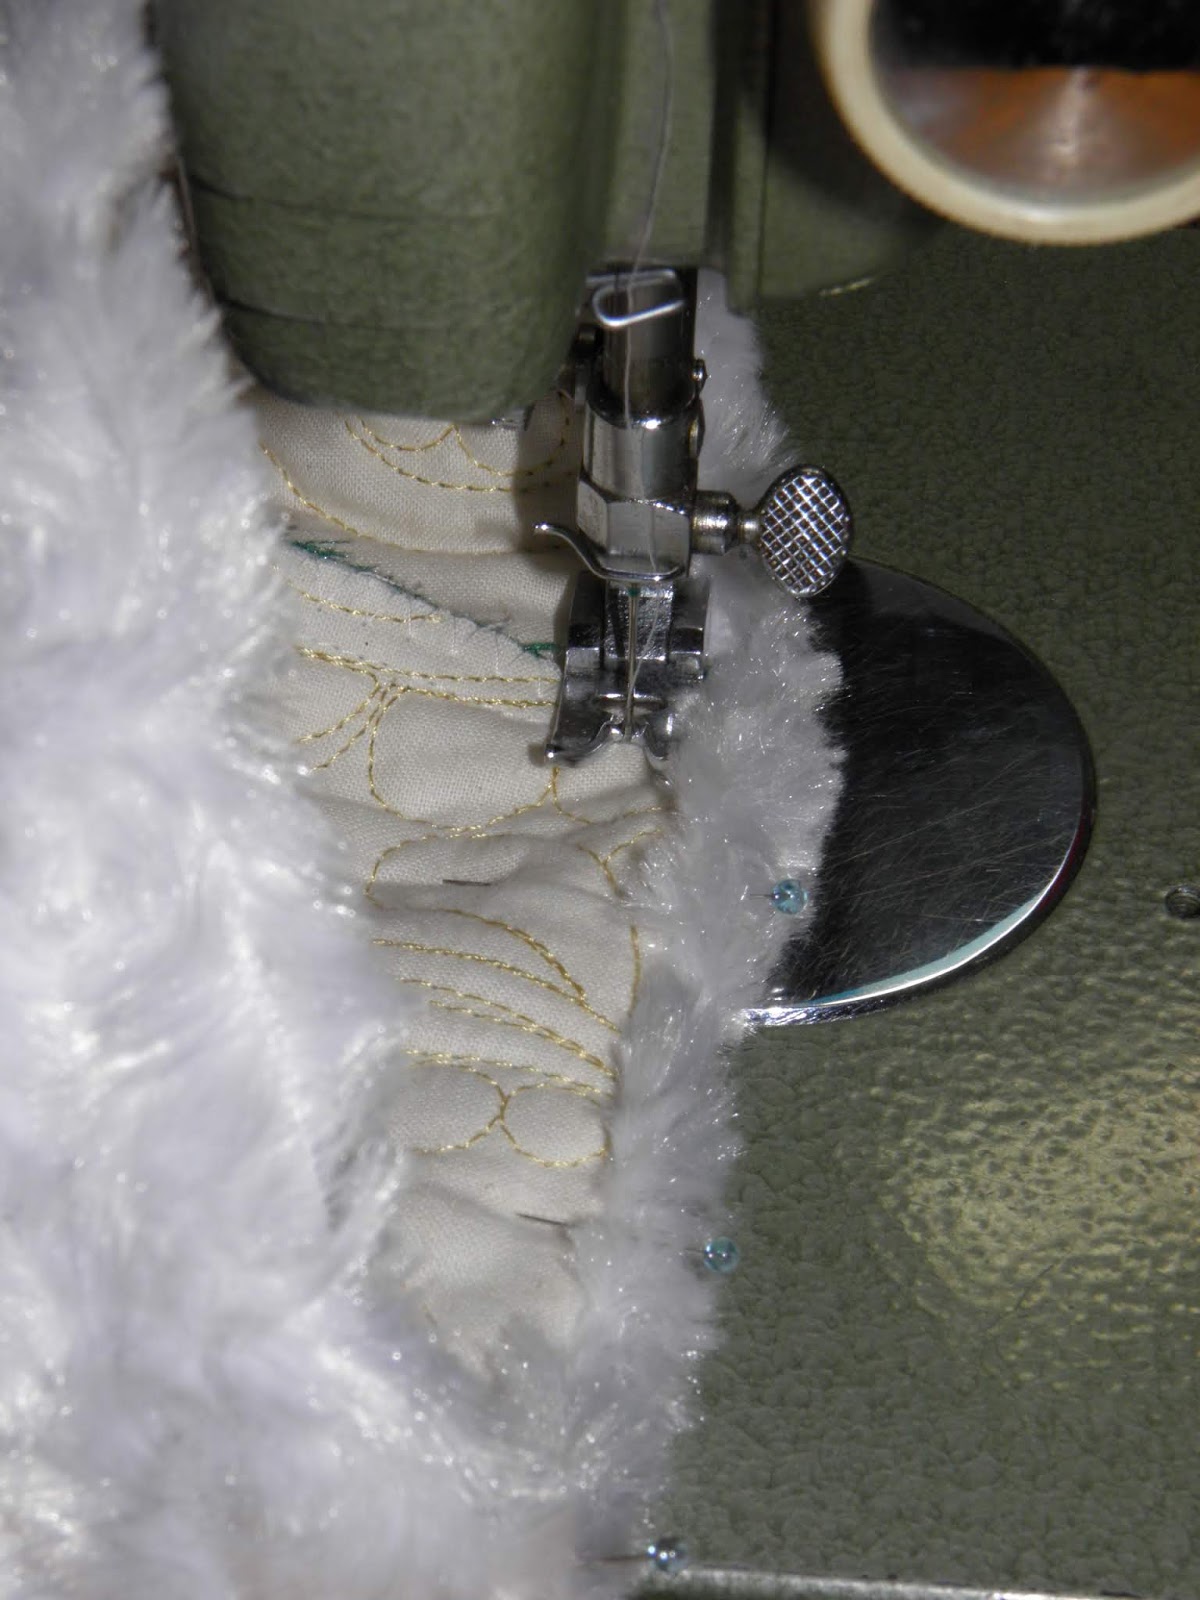 |
| I found that setting my stitch length to 3 allowed me to pull the bits of minky that were held down by the stitches back out and basically hid the stitches. |
Have a wonderful day!
~Brandy
What gorgeous stockings! Quilting the stocking makes it so detailed and fancy. Thank you for the tutorial and tips.
ReplyDeleteAwesome stockings! I swore never to use Minky. 1 Million stitches?? Wowser! I wonder how many I have on my machine...lol
ReplyDeleteVery very nice..I love to make a stocking for every new grandbaby...happyness04431@yahoo.com
ReplyDeleteStunning shiny stockings, and to quilt the whole piece first what a great way to get that texture.And the cuffs, a great finish and super tutorial.We share the last day of another wonderful blog hop, many thanks to Sarah and everyone who has participated. I will save your pattern details for later this year, a friend has some grandies of just the right age . But even adults can enjoy a stocking as well.
ReplyDeleteVery pretty stockings. Would be the perfect addition for a mantle in our 1888 Victorian gothic home. (Ardoyneplantation.com) Thanks for sharing! Susanpshaffer@gmail.com
ReplyDeleteWhat a great idea! They are beautiful.
ReplyDeleteThey are beautiful! Our local longarm group is doing a challenge on stockings this year. All the stockings use the same fabrics and pattern, the challenge is how we quilt them secretly and then show them when everyone is done.
ReplyDeleteWow, these are so so beautiful! Some day I hope to have a long arm!
ReplyDeleteQuilted satin is so elegant, wonderful stockings!
ReplyDeleteI love what you did with the quilting. I have never tried to quilt on satin, but just have to try it now. :)
ReplyDeleteLove the ease of the stockings.
Those are super pretty stockings - the stitching on the satin is just lovely!
ReplyDeleteTruly elegant stockings! Thanks for sharing the tutorial!
ReplyDeletewow these are gorgeous. thanks for sharing to day
ReplyDeletequilting dash lady at cocmcast dot net
Wonderful quilting. And the stockings are a perfect use of that fabric. Thanks for sharing.
ReplyDeleteYOur stockings are stellar. The satin works up beautifully. Thanks also for that Minky/blue tape tip. It's pretty much priceless.
ReplyDeleteWow! Beautiful stockings and you are prepared ahead for Christmas.
ReplyDeleteBeautiful. I love how the quilting pops with the fabrics.
ReplyDeleteWow! Just incredibly gorgeous!
ReplyDeletePERFECT use for that quilt sample!!!
ReplyDeleteYour stockings are beautiful! Thanks for sharing.
ReplyDeleteVery pretty stockings!
ReplyDeleteWhat a great idea. Makes for some pretty stockings.
ReplyDeleteThese are so so pretty, Brandy, and what a great idea! I'm so glad you "thought ahead" and came up with this beautiful project! Thanks for all your hard work.
ReplyDeleteBeautiful stockings. Could you share the name and maker of the panto you used on the green stocking, I love it.
ReplyDeleteThose satin stockings are gorgeous! I'll definitely have to give this a try. Thanks for the inspiration!
ReplyDeleteWow! What gorgeous stockings!! Love the satin! And thanks for the minky tips. Thanks so much for sharing with us!
ReplyDeleteLove the quilting and those stockings are adorable!
ReplyDeleteWow!!! A million stitches! That is amazing. Thank you for the stocking tutorial.
ReplyDeleteNancy
nanrae44@hotmail.com
I really love those stockings. Your quilting looks amazing. Brilliant idea!
ReplyDelete